All right. I am on hiatus. BUT! I have 2 big bashes coming up while I am away and (as much as I wanna share my projects and ideas with you, you'll have to wait) and I have some FUN things to show you how to do and to share with you.
BUT! I promised a reveal of my baby's 1st b-day party theme: JUNGLE SAFARI. Now, this isn't going to be really cute-sy and stuff. I got some fun animal print paper and other stuff and can't wait. I DO have to decide what I am going to do for the cake. My baby drinks milk and stuff already so I am not worried about first-time exposure to dairy, wheat, egg protein, etc. but as far as cupcakes v. a mini cake for the birthday buddy and cake vs. cupcakes for the gifts. PLUS. I reserved a park from 9-sometime and so the party is at 10:30. Are people getting ready for lunch, is it too early for a lot of sweets, do people not wanna eat at 10:30 a.m.?? These are all questions I am asking myself. Please weigh in about what you did, what you would do if you were me, or other ideas I didn't think of. Please?! I am kinda hoping I come back to a lot of comments telling me just what to do. Gotta be honest.
Okay. Well. You all have a really, really great week and a wonderful Memorial Day. So many, many thanks to the men and women who have served and who still serve our country so that we have the right to live a life that makes us happy and to raise our children how we best see fit. So grateful to those in the armed forces. You/they are all in my prayers.
Friday, May 28, 2010
Tuesday, May 25, 2010
It's all in the packaging...
It's the most wonderful time of the year.... one more week of school from where I sit, and I am sure most of you are about 1-3 weeks 'til the end too. So it's that time when we want to let the teachers know how much we appreciate them and give 'em a little something. Typically we turn to treats, no? So instead of a Styrofoam plate or a Ziploc baggie with some homemade (or store bought) goodies, why not do something SO simple that looks extra special? After all most of the time hand cooked and hand made gifts carry the most meaning for the fewest dollars.

I started with a 4 by 6 cello bag and used it as a template to cut my rice krispie treat to size (note, because the treats are thick you will need to cut it about an inch smaller than the actual bag).
I stuffed the treat inside, folded the top over, stuck a sticker that matched the thank you card I made.
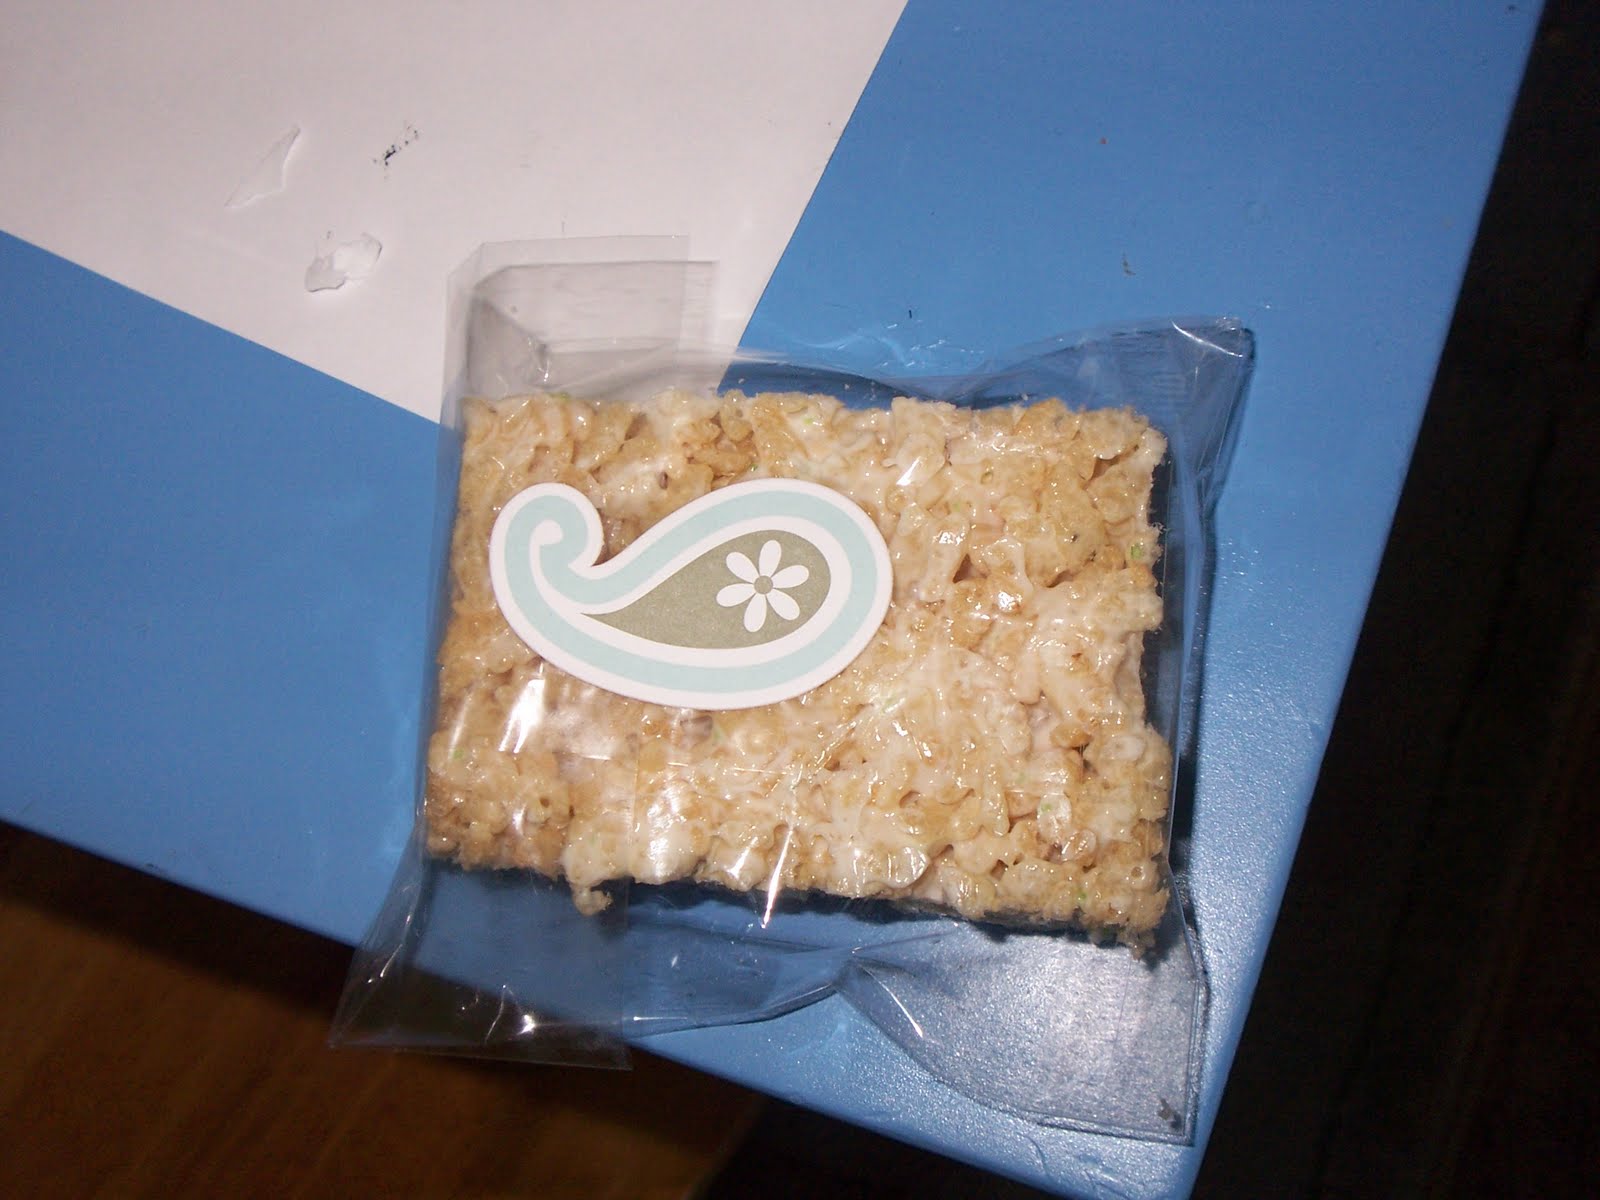
and voila. A simple, inexpensive, but absolutely darling way to say, "thank you". You could use this idea for a neighbor gift or a gift for visiting teaching wherein you could include the message and a goodie... the possibilities are endless. If you don't like, are opposed to, or didn't make Rice Krispie treats, stick a couple of cookies or some candy inside instead.
Sassy Scoops

There are always people advocating others to support local businesses, but here's a company that not only asks others to, but makes sure they do everything they can to help.
Sassy Scoops checks out local businesses and reviews them for us, they do giveaways to help people try these places out, they make sure people can find them so they can send people (electronically of course) off to other websites, and they advertise for businesses so we know what's out there.
I know I personally love to find a new place to eat or shop, but also that that happens once in a blue moon. Not now. Thanks to Sassy Scoops I can pop onto their website and hear about all sorts of new places that someone else has already checked out first to make sure it's worth it.
Thanks Sassy Scoops.
Friday, May 21, 2010
Stay Tuned!
Get Ready to Partay!!
Hey all and welcome to those new followers! I am so excited to have you and glad you found me. I hope I can teach you something new or give you some good ideas. Thanks for joining me!
I will not post anything new until the end of the weekend or beyond probably, but I wanted to let you know what I have planned for coming up in the next week or two.
I am going to be doing a birthday party series. My baby is turning one and I am planning a really fun party. I am making favor bags, a party hat, food, a banner, decorations, etc. All the things I do will be for the party I am throwing so make sure you keep an open mind and your idea book close at hand so you can imagine the projects for your own parties. I will include tutorials for anything I can and if I show an idea and do NOT do a tutorial but you would like me to, make sure you leave me a comment letting me know and I will get on it right quick!
I will reveal the theme of my party tomorrow along with (I hope) a quick tutorial on digiscrapping your own invites!
Happy Crafting!
Brooke
Wednesday, May 19, 2010
Clothespin wreath
Had this posted yesterday as a guest post at thecountrychiccottage.net

So. Today I am going to show you a craft I imagined up while doing laundry. Our laundry rooms are often bland, but I thought it would be fun to make a wreath out of clothespins for my laundry space (note, my 'laundry room' is the back half of my bathroom and shares space with the toilet. They get along swimmingly.).

Supplies:
A wooden wreath form (or cut one out of cardboard to save $$$), scissors, matte Mod Podge, Foam brus(es), 36 clothespins (one package from the dollar store!), various coordianting papers, paper cutter, nail file, acrylic paint.

Paint your wreath form along the outside and inside white. Paint any other part that might show, too. I.e. I am hanging mine on a mirror/window in my laundry area and so the back will be visible. I painted the back white as well.

Trace and cut paper to cover your wreath form. I wanted my background to be simple so I chose white. Measure and cut two 12" by the width of your clothespin of each of your papers. If you have double sided paper cut four strips.

Mod Podge your backgroud paper onto your wreath form, trying not to get any bubbles in your paper. I got a few but since I am covering it up it wasn't a HUGE deal. Use the nail file to 'sand down' any paper that hangs off the side.

Mod Podge your strips of paper onto your clothespins. Coat a thin layer of Mod Podge onto the clothespin and then carefully attach your paper strip. Using scissors trim the strip off at the end of the clothespin.
Repeat for each clothespin. Then finish them with a couple of coats of Mod Podge to seal.

Lay out your clothespins on your wreath to arrange how you would like the to look. You can do more clothespins for a tighter look, just buy a second package!

Hot glue your clothespins one at a time to ensure the spacing stays how you want it.

I like simple and clean and fresh in a laundry room so I am not planning to embelish mine (although I may buy some wooden or chipboard letters to spell out 'laundry' and attach them later) but you can add a bow, or flowers, or words... it is completely up to you!
Hang in your laundry room and enjoy!


Two quick ideas (that are really the same idea) for Mod Podged clothespins. Think about Mod Podgeing clothespins and attaching magnets to the back and then using them either:
On a magnetic message board in your kids' room
or
On your fridge to hang your child's art or grades. You can use paper to make them match any decor.
You can also spray paint the clothespins first for a less 'natural' look. I wanted my clothespins in my laundry room to still look like clothespins, but if you sprayed them hot pink first and then Mod Podged girly paper on them, they would look SO stinkin' cute. I would embellish with buttons, glitter, sequins, ribbons, stickers, etc. if I were putting them on a message board in my kid's room
Monday, May 17, 2010
Guest Posting today... head down the street to visit me at country chic!

HEY! I am guest posting today at The Country Chic Cottage. Pop on over and check out my fun idea for decorating your laundry room and while you're there check out some of her darling ideas. Love her!
Oh. and Mod Podge rocks featured it on her FB page! Check it out here!
Happy Crafting!
Brooke
Friday, May 14, 2010
Saturday, May 8, 2010
I'm linking up to SNS at funkyjunk interiors!
Head on over and check it out! She's set up a huge link party with three different categories to link to.
I entered all of my lamp re-dos and my dining table.
Let me know if you link up!
I entered all of my lamp re-dos and my dining table.
Let me know if you link up!
Monday, May 3, 2010
Makeover Monday
A little late, but technically it is still Monday! And that is good enough for me.


I will apologize in advance, bloggy friends for the disaster in the background. I dumped my craft tub looking for just the right embellishments. Another word for embelishments: additives. Isn't it funny that we really are quite against additives in our food as a general rule, but additives in crafts just make everything... more yummy?! They make food more yummy, but we know the down side to putting them in our bodies. I don't think there is a down side to additives in our crafts! But I digress.
So. I found this cute sign and in reality was pretty fine on its own.
But we aren't satisfied with fine, are we ladies?!
So makeover Monday this Monday is making something new even better and more delicious with additives. We'll veer away from my traditional course of taking something old and making it better. We're going to personalize one of those cute, but run-of-the-mill signs we see everywhere so that it really is something special.


Using various sizes and textures of rick-rack and cloth ribbon I added some framing to the sign.
I used MIGHTYMENDIT! and glued the ribbons to the back of the sign on the top and bottom with a dot of MIGHTYMENDIT! in the middle too. I liked the contrast of the black and cream and I felt it really stood out from the dark with dark lettering.

Then even though the sign came with hangers on the back I felt like it was just one more opportunity to add somet extra special. I found some cute cream with blak dots ribbon and tied it to the hangers. Then I tied little bows to the bottoms of each side to a.cover up the little tail of ribbon that hung off when I tied the ribbon to the sign and b. I thought it looked really cute.

Voila. You probably won't have the same sign as me, but I hope this inspires you to take something that was cute but generic and really make it your own. Happy Monday!
Subscribe to:
Posts (Atom)